


NeuroMaker Hand 2.0
Real-World Problem Solving
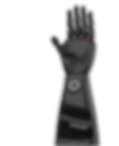
The NeuroMaker HAND 2.0 is a game-changing educational prosthetics, empowering students to bridge classroom learning with real-World applications.
Designed by our actual prosthetic hand and knee engineers, it immerses students into the challenges encountered by amputee, inspiring them to devise innovative solutions. Through hands-on building, coding, and creative problem-solving, students apply their transferrable skills, paving the way for a more inclusive and empathetic future.
Student- Centered Projects
DIY
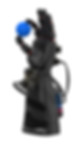
Expand with 23 Programmable BioSensors

Block- Based & Arduino C Coding
100+ hrs
Flexible Curriculums Modules
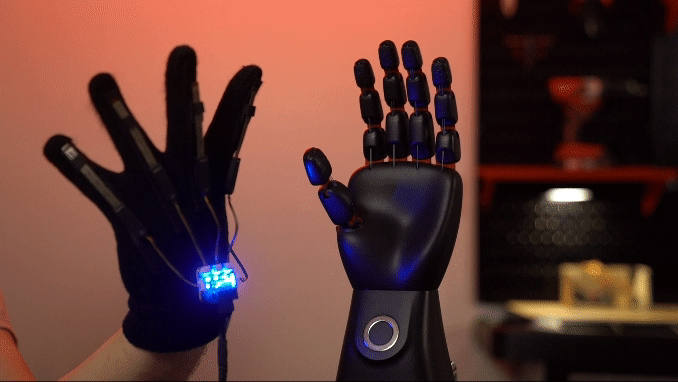
EMG
Programmable AI Module
Third Party Sensors & Microcontrollers
Professional Development for Easy Implementation
EEG
Brainwave Control
NeuroMaker Creative Challenge

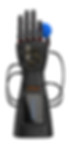
Tendon-Driven, Fully Programmable Fingers
Adjustable Thumb Base
Magnetic Ring to Attach BioSensors
Socket Designed for Hand Grip
Supports Up to 6 High-Precision Servo Motors
NeuroMaker Core Controller for Programming and Expansion
Stackable Plate

Flexible Finger Joints
Even with no coding, the IR Remote enables finger control, gesture customization, Biosensor pairing, and beyond.
Build It!

Modular design and packaging lets you build your NeuroMaker HAND from the ground up, offering an immersive hands-on experience with every component. Organized packaging enables easy disassembly, storage and reusability.
Use Blocks to Program in Browser
Ideal for introductory programming courses, block-based programming allow you to visualize, design, and enhance your control programs effortlessly, even if you're a novice. With built-in blocks, programming the HAND and all BioSensors becomes straightforward and accessible to everyone.
I'm a paragraph. Click here to add your own text and edit me. It's easy.


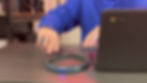
Student-Oriented Projects
Interactive, hands-on project series designed to engage students in collaborative learning environments. Teams work together through a series of progressive stages—from assembly and coding to creative problem-solving and a final capstone design challenge. With minimal direct instruction, educators serve only as facilitators, while students explore, experiment, and evolve their ideas into tangible, helpful tools for those in need.
Endless Combinations
Unlock boundless creativity with the NeuroMaker BioSensor Kit, engineered to sense muscle signals, hand gestures, body movements, and environmental factors including objects, colors, magnetic fields, and beyond. With 27 extra analog and digital ports at your disposal, elevate your projects to unparalleled heights of innovation and customization.


Compatible Thrid-Party Microcontrollers
The NeuroMaker HAND 2.0 is designed for seamless integration with popular open-source education hardware platforms, including Micro:bit, Arduino, Raspberry Pi, Adafruit, and more. Users can effortlessly connect and power these devices through Port F on the HAND controller.


The NeuroMaker Creative Challenge
The NeuroMaker Creative Challenge is an annual, open design competition for middle and high school students around the world in order to create real-wrold solutions via the connections between Brain-Computer Interface, Artificial Intelligence, programming and more.
USD $1,200
First Place Award
Free
to Enter
300+
Schools in North America